
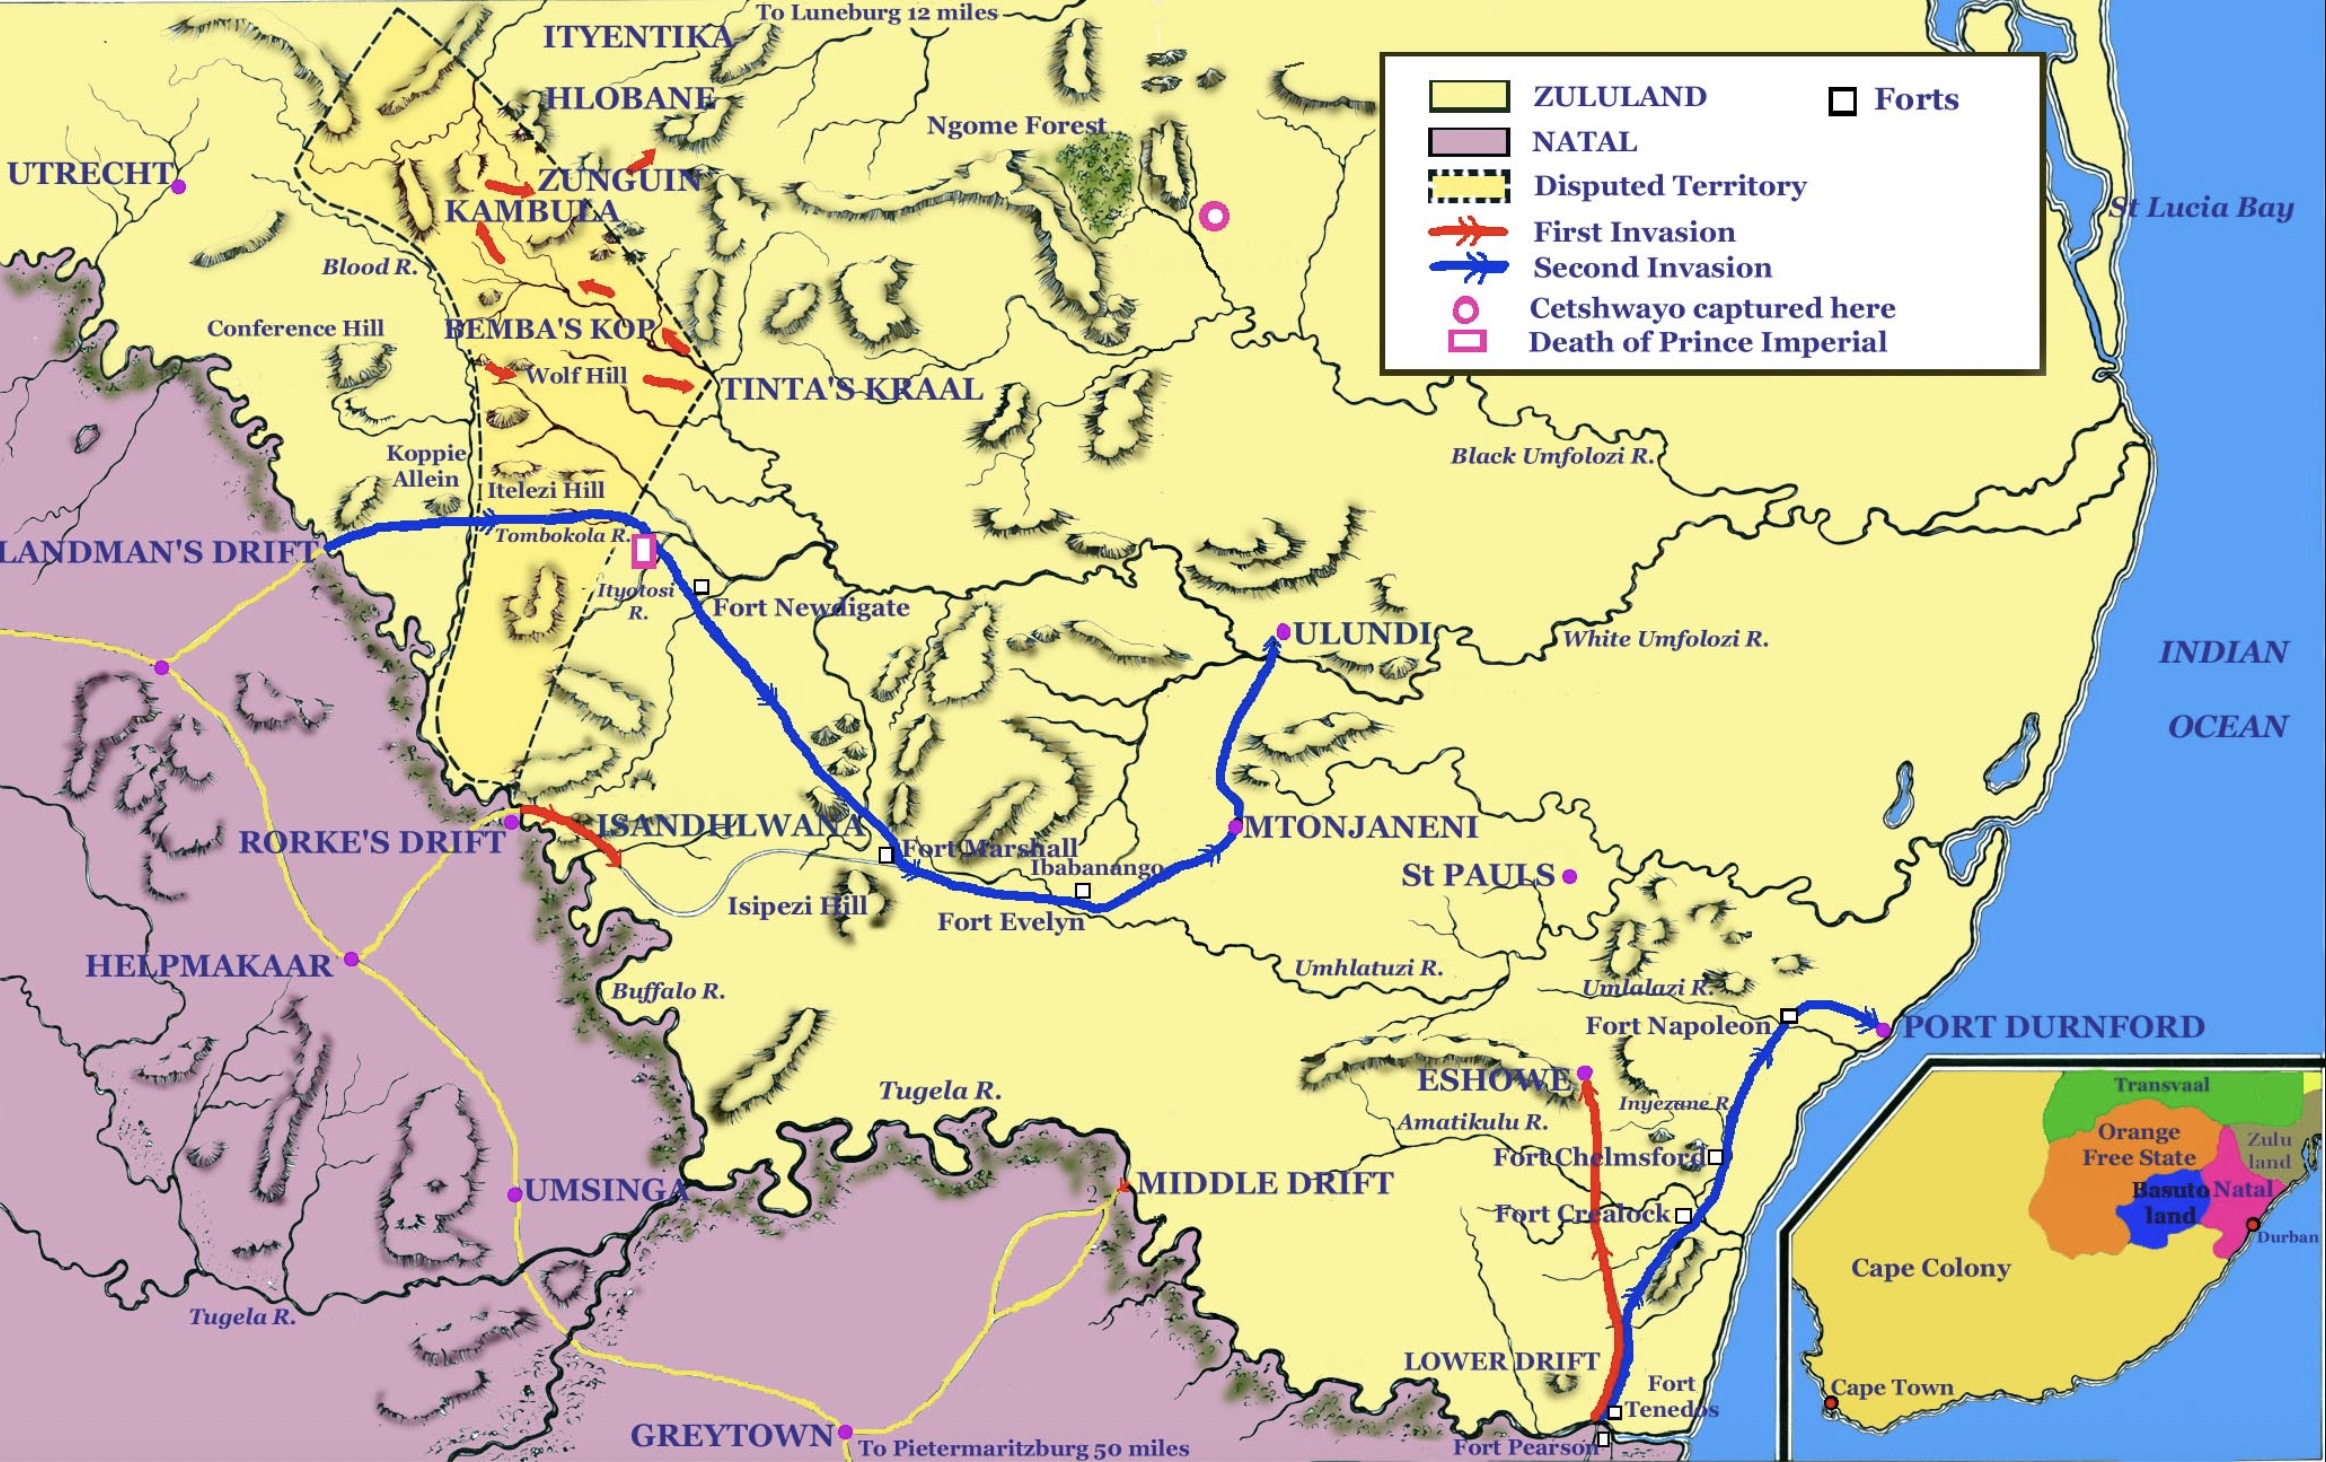
The story of 1879 in southern Africa is often told through a single shock: the British disaster at Battle of Isandlwana. But that moment, dramatic as it was, is only the beginning of a much larger scenario.
In this tranche of episodes, we follow the war as it moves from chaos to consolidation—through the British reverse at Battle of Hlobane, the decisive defensive victory at Battle of Khambula, and the relief of Eshowe after Battle of Gingindlovu. What emerges is a pattern: initial overreach, painful correction, and the application of overwhelming force.
At the same time, the lens widens. In Kimberley, figures like Cecil John Rhodes are being shaped in the furnace of capital and frontier politics, while British command under Lord Chelmsford begins—belatedly—to adapt. Intelligence improves, laagers harden, logistics tighten. Lessons are learned, but at a cost measured in thousands of lives.
There is also a deeper thread running through these episodes: the limits of power. The Zulu army, under leaders such as Ntshingwayo kaMahole Khoza and Mnyamana Buthelezi, shows extraordinary discipline and courage, yet remains constrained by tactical orthodoxy. The British, for their part, demonstrate how empires recover through scale, adaptation, and an increasing willingness to wage total war. There is a modern aspect to the idea.
These are the weeks in which the balance tips.
And as ever, the echoes travel far beyond 1879.
Episode 261 – Zulu War: Ntombe River Massacre & Prince Hamu’s Defection
In this episode, we follow Colonel Rowlands’ No. 5 Column as it operates along the uneasy northern frontier of the Transvaal during the Anglo-Zulu War. Tasked not only with guarding supply lines and nearby Boer settlements, the British also faced the threat of unrest from Boers eager to exploit the conflict.

Tensions escalated in the Ntombe Valley, where Zulu leaders including Mbilini and Manyonyoba coordinated raids. Despite earlier signs that Manyonyoba might negotiate, he ultimately joined the war effort under pressure from his commanders. Their forces targeted the amakholwa—Christian African communities—killing dozens, destroying homes, and seizing cattle.
British forces retaliated with a punitive expedition led by Major Charles Tucker and Redvers Buller, destroying settlements and capturing livestock, though Manyonyoba himself escaped.
The situation worsened when a vulnerable supply convoy heading to Lüneberg became stranded by heavy rains near the Ntombe River. A critical misjudgment saw its escort abandon the wagons, leaving them exposed. Zulu forces under Mbilini, who had been closely observing British movements, prepared to strike—setting the stage for disaster.

Meanwhile, political intrigue unfolded behind the scenes: Prince Hamu, kept under watch by King Cetshwayo, was secretly communicating with the British through intermediaries, hinting at shifting loyalties within the Zulu leadership.
Episode 262 – The Battle of Hlobane: Cowardice, Confusion and the Reckoning at Devil’s Pass
As the war intensified in March 1879, King Cetshwayo made renewed attempts to negotiate peace with the British. His envoys, arriving at key crossings like Middle Drift and Eshowe, carried a simple message: the king wanted the fighting to end. But British commanders, including Lord Chelmsford, rejected these overtures outright—suspecting deception and treating emissaries as spies rather than diplomats.

With diplomacy failing, the conflict escalated. Cetshwayo, now joined by his main army at oNdini, resolved to strike. His attention turned toward Colonel Evelyn Wood’s column in the north.
Wood, still reeling from losses at the Ntombe River, received unexpected reinforcement in the form of Prince Hamu—Cetshwayo’s brother—who defected to the British. Hamu’s forces, some of whom had recently fought against the British at Isandlwana, were swiftly incorporated into Wood’s ranks, offering valuable intelligence despite the uneasy optics of former enemies changing sides.
Encouraged by this development, Chelmsford urged Wood to take the offensive. A successful action in the north, he hoped, might relieve pressure on British forces besieged at Eshowe and disrupt Zulu coordination.
Acting quickly, Wood launched a daring two-pronged assault on the abaQulusi stronghold at Hlobane Mountain on 28 March. It was a bold but risky move—he lacked clear intelligence on Zulu numbers or the terrain ahead. What followed would descend into confusion and chaos, culminating in a brutal reckoning at Devil’s Pass.
Episode 263 – How Black Voters Helped Elect Cecil Rhodes: Kimberley and the Cape Franchise, 1879
As the dust settles after the British defeat at Battle of Hlobane, attention shifts south-west to a very different theatre of conflict—one defined not by open battle, but by politics, capital, and social fracture.
In the Transvaal, Boer resistance to British annexation is quietly consolidating. Meanwhile, Kimberley is booming—a chaotic frontier economy where diamonds are rapidly reshaping society. Beneath the wealth lies disorder: exploitative labour systems, racial segregation, illicit diamond trading, and appalling living conditions. Visiting author Anthony Trollope captures both the brutality and contradictions of the town, noting the hypocrisy of a system dependent on Black labour while denying it dignity or equality before the law.
Amid this volatility, key figures begin to emerge. Cecil John Rhodes is shaped by personal tragedy—particularly the death of his brother Herbert—which seems to harden his already austere worldview. Around him, Kimberley’s rough politics offer lessons in power: Barney Barnato demonstrates the effectiveness of populism and patronage, while J. B. Robinson reveals the influence of media and messaging.

Rhodes absorbs both. Adapting his image and strategy, he successfully enters politics in Barkly West—ironically securing victory with crucial support from Black voters under the Cape’s qualified franchise. At the same time, he forms a pivotal alliance with Leander Starr Jameson, whose ambition and opportunism mirror his own.
This episode captures Kimberley at a formative moment: a place where race, capital, and power begin to fuse into patterns that will define South Africa’s future—just as events in Zululand move toward their निर्णng climax.
Episode 264 – The Forgotten Battle of Khambula (1879): The Turning Point of the Anglo-Zulu War

In the aftermath of the British setback at Battle of Hlobane, the focus shifts to Battle of Khambula—a decisive but often overlooked engagement that would fundamentally alter the trajectory of the war.
Facing a Zulu force of roughly 20,000 under Ntshingwayo kaMahole Khoza and Mnyamana Buthelezi, Colonel Evelyn Wood held a carefully fortified position at Khambula. Unlike earlier British failures, this was a defensive system designed in depth: interlocking wagon laagers, a redoubt on high ground, pre-measured artillery ranges, and clear fields of fire. The British, though heavily outnumbered, held a significant technological and positional advantage.

Zulu commanders, under instructions from King Cetshwayo kaMpande, initially avoided a direct assault. However, a premature and uncoordinated advance by the right horn—whether through miscommunication or internal rivalry—played directly into British hands. Mounted troops under Redvers Buller successfully drew this wing into range, where disciplined rifle and artillery fire shattered the attack.
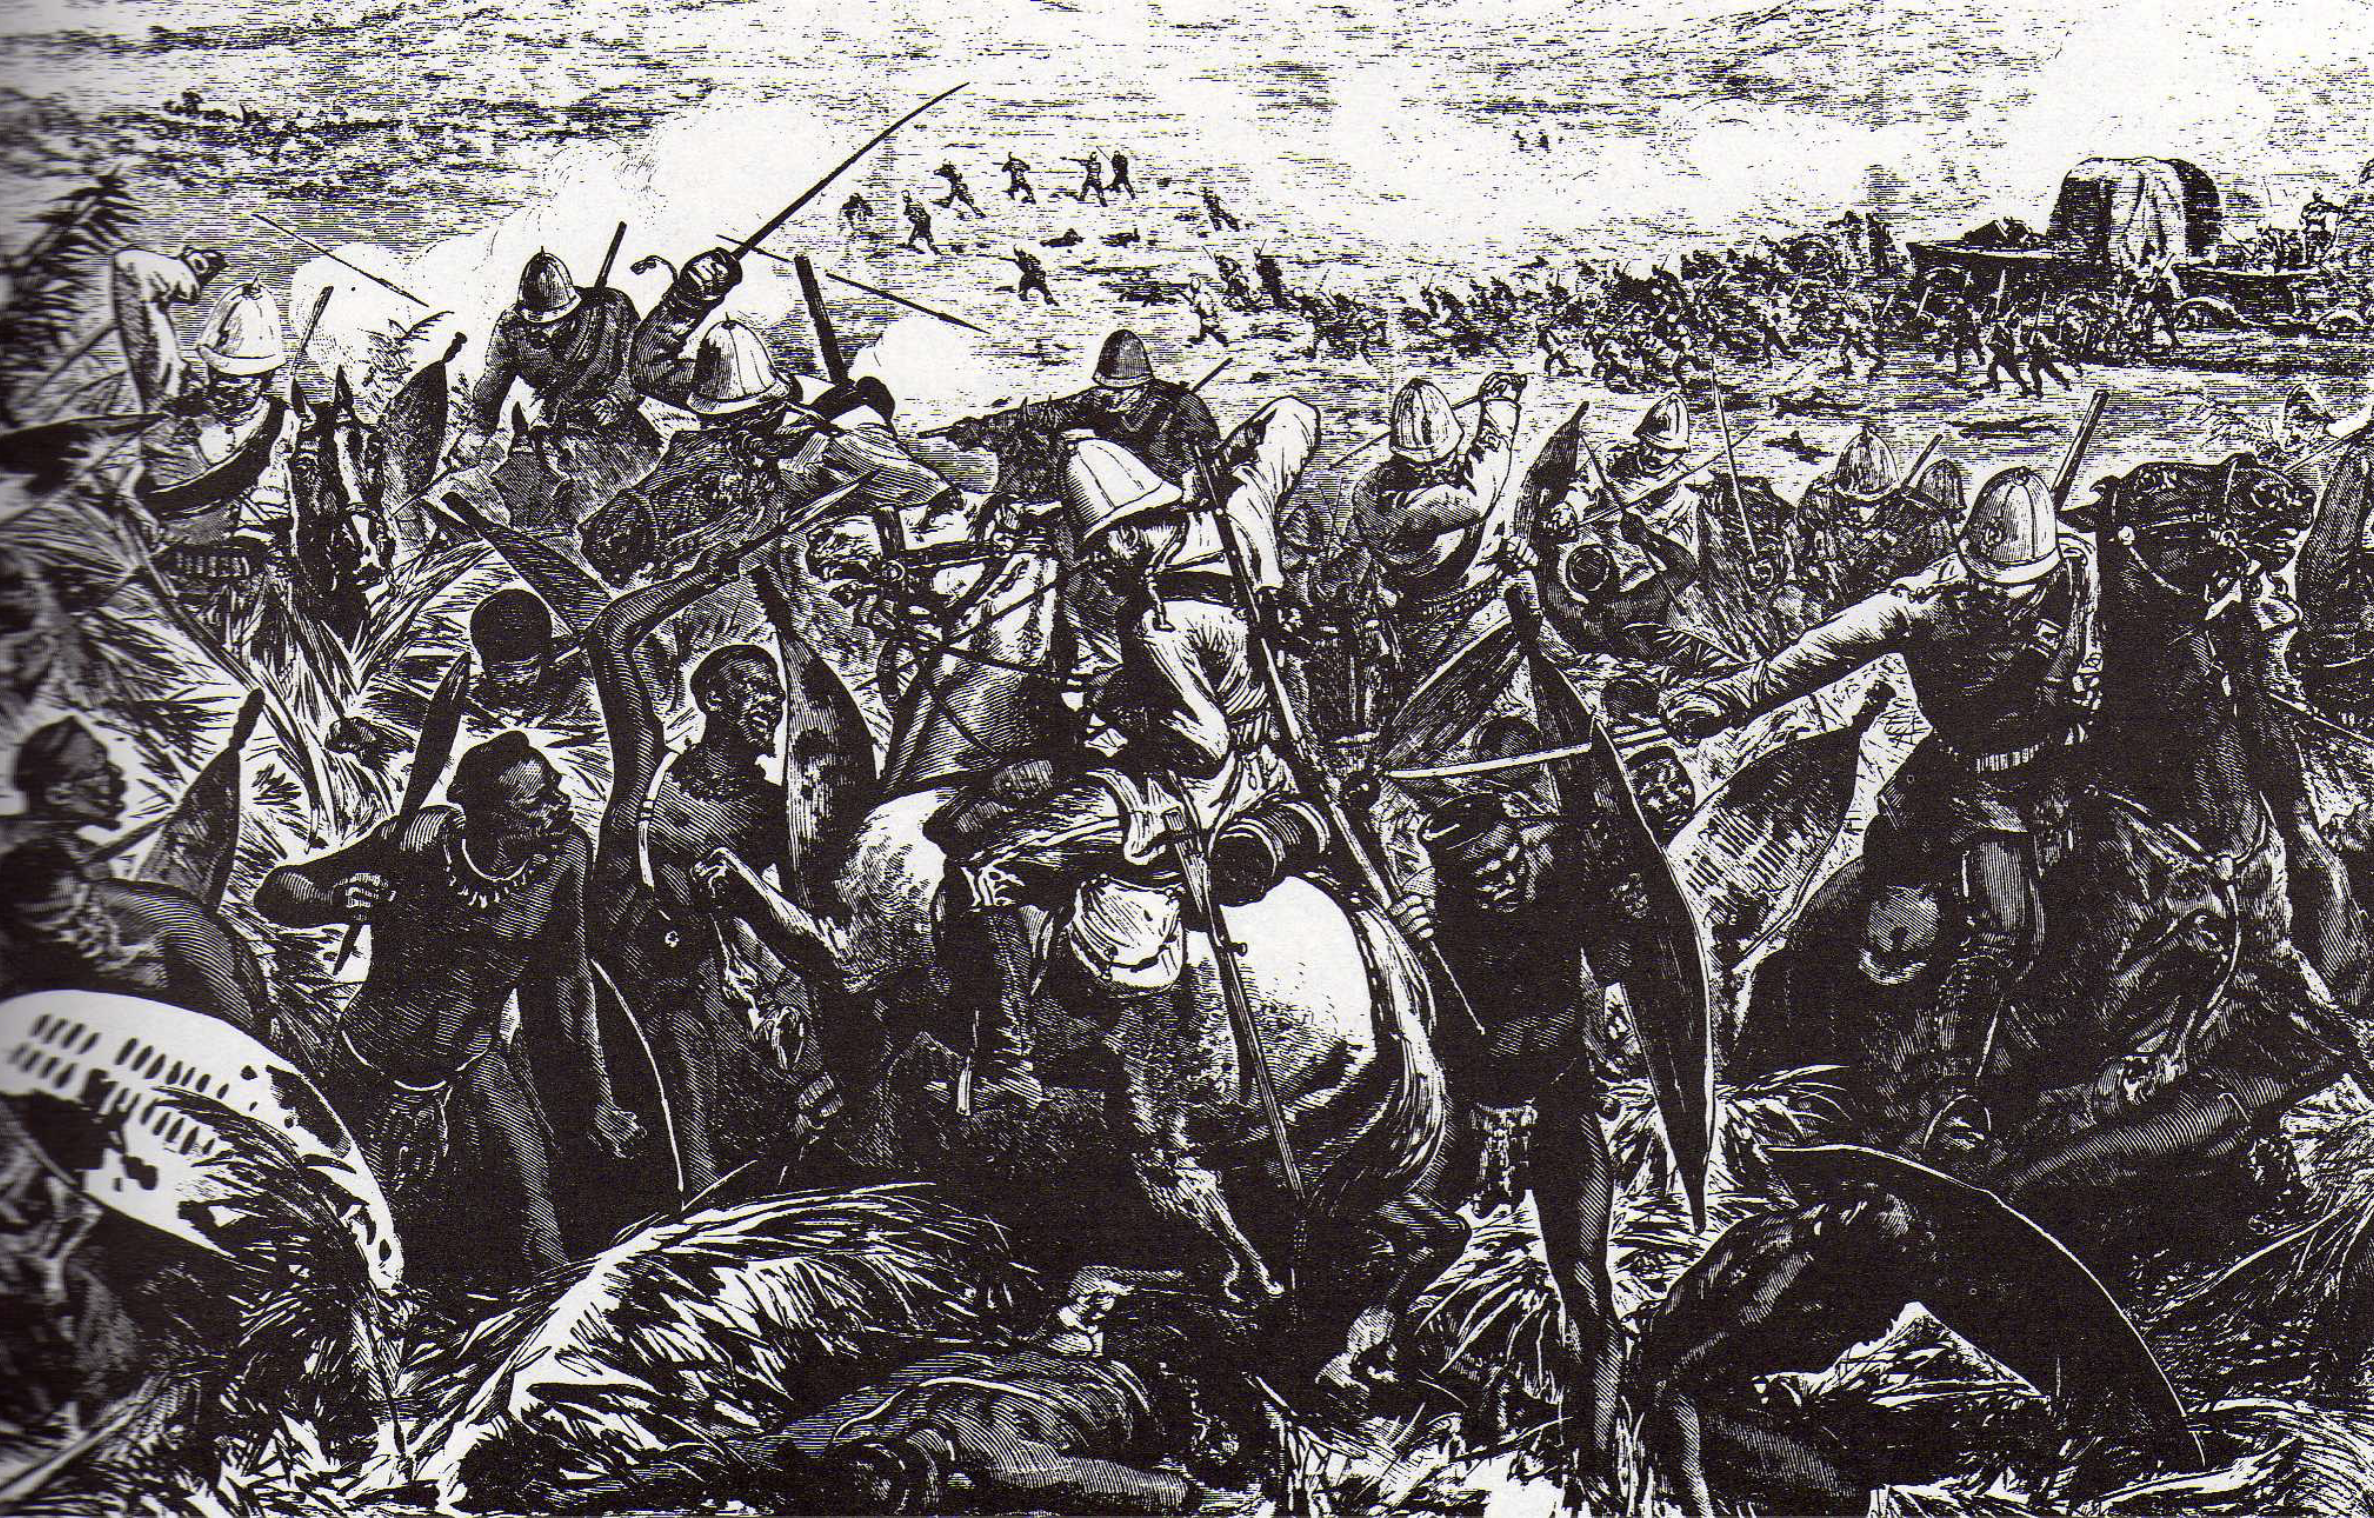
Subsequent assaults by the Zulu left and centre showed extraordinary determination, at times penetrating close to the British lines and even seizing parts of the cattle enclosure. Yet without full coordination, and under relentless firepower, these attacks stalled. British counter-moves, including aggressive bayonet charges, further disrupted Zulu momentum.

By late afternoon, the Zulu advance had culminated. What followed was a devastating mounted pursuit, turning retreat into rout. British forces, still reeling from Hlobane, exacted a brutal retribution. Casualty estimates suggest between 2,000 and 3,000 Zulu dead, including many experienced regiments and senior leaders, compared to relatively light British losses.
‘Don’t run away Johnnie, we want to speak to you..”
Zulu warrior to British troops
Khambula marked a critical turning point. It broke the offensive capacity of the Zulu army and deeply shook the authority of Cetshwayo, while restoring British confidence after earlier defeats. On the same day, Lord Chelmsford advanced with a reinforced column to relieve Eshowe—signalling a shift toward overwhelming force and the beginning of the end for Zulu resistance.
Despite its scale and consequences, Khambula remains overshadowed in popular memory—yet it was here that the balance of the Anglo-Zulu War decisively tipped.
Episode 265 – John Dunn’s MI5 Connection, Gingindlovu, and the Relief of Eshowe

Episode 265 steps back from the battlefield detail to situate the Anglo-Zulu War within a broader pattern of imperial overreach—drawing a pointed parallel between late 19th-century expansionism and modern geopolitical miscalculations. Britain’s invasion of Zululand, partly driven by tensions with the Transvaal Boers, had already produced shocking reverses at Battle of Isandlwana and Battle of Hlobane, while Colonel Pearson’s force remained besieged at Eshowe. Confidence in London was beginning to erode, and pressure mounted on Lord Chelmsford.
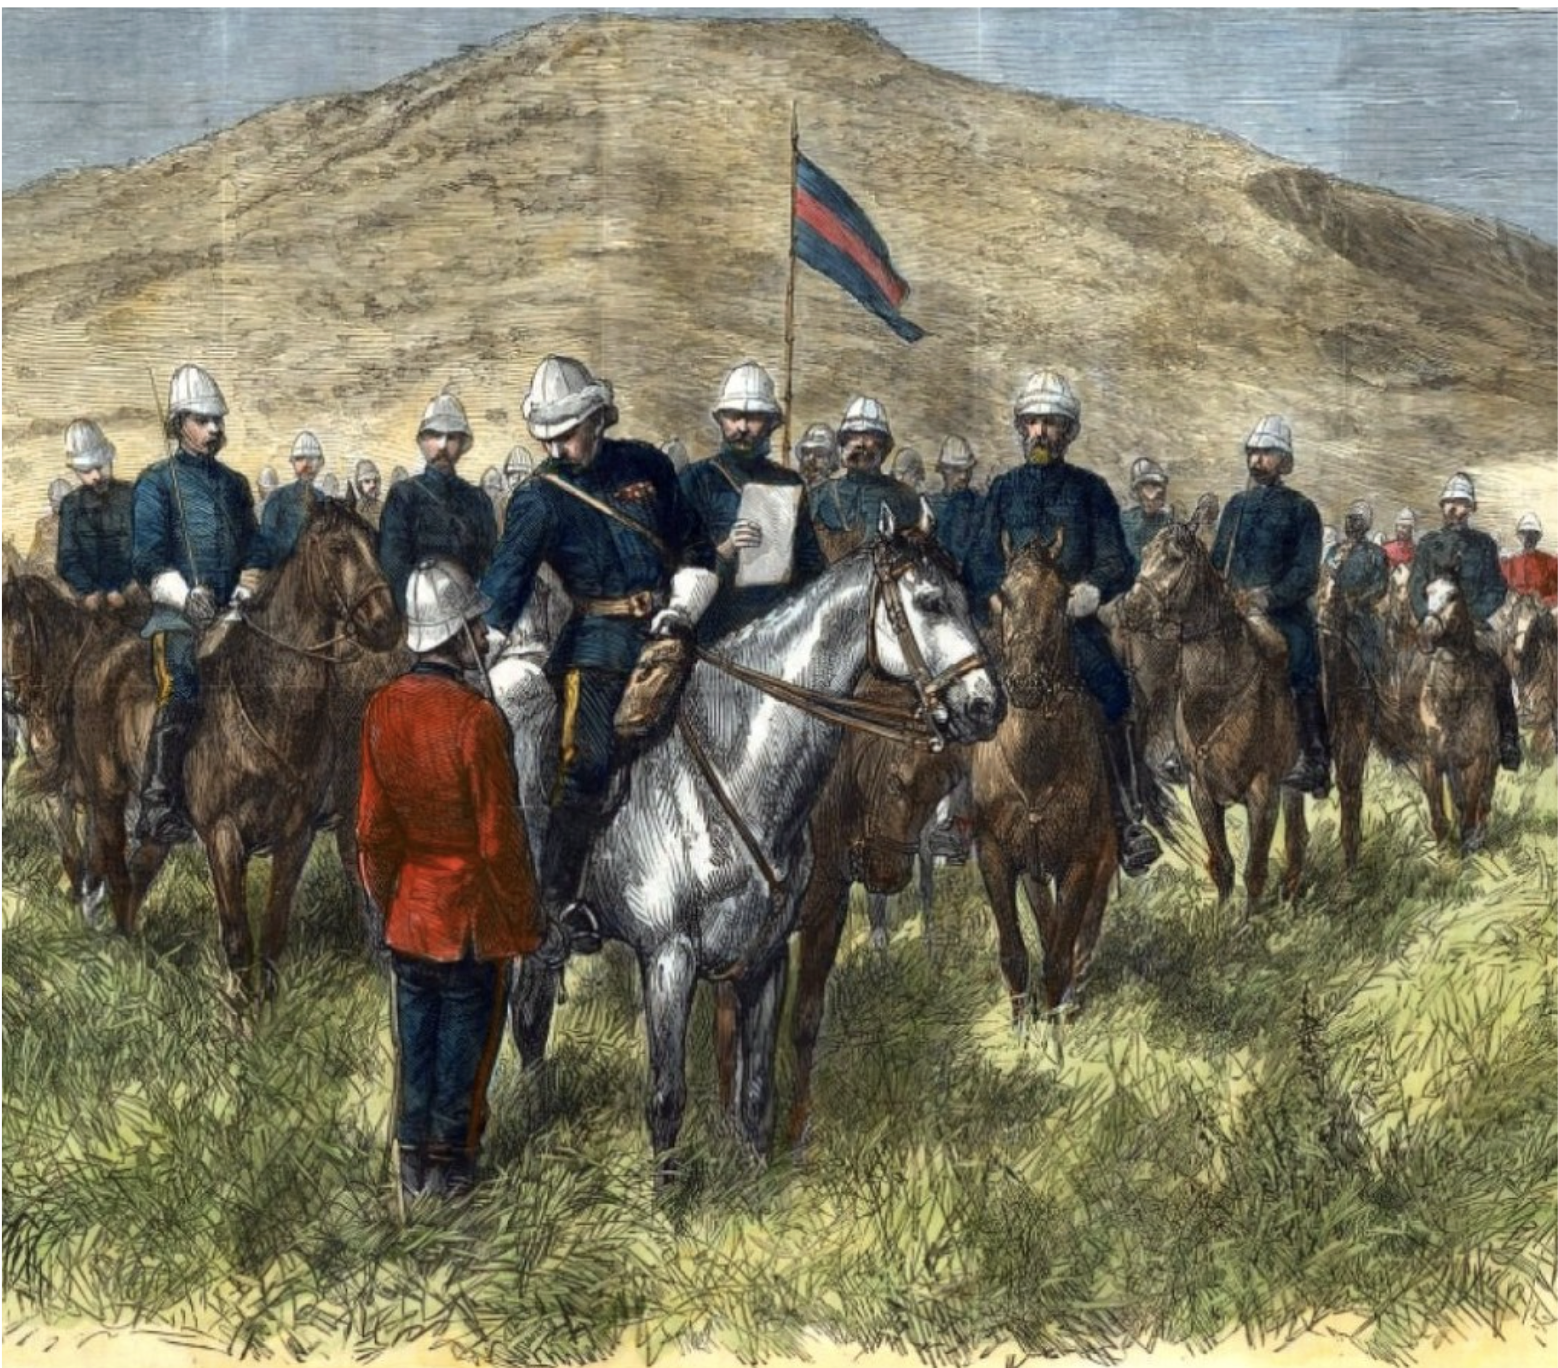
The focus then shifts to Chelmsford’s relief column advancing from the Thukela to Eshowe—his largest and most carefully prepared force yet, numbering nearly 6,000 men. Crucially, he now relied on the intelligence and local knowledge of John Dunn, whose role marked an early evolution in British military intelligence. Dunn’s warnings proved accurate: a Zulu force of around 11,000 under commanders including Somopho and Dabulamanzi kaMpande lay in wait.
“Who is he? A special messenger from Lord Chelmsford, with important dispatches…”
A member of Pearson’s staff
At Battle of Gingindlovu on 2 April, the Zulu launched a classic encircling attack. This time, however, Chelmsford’s fortified laager, prepared artillery, Gatling guns, and disciplined infantry volleys proved decisive. Despite extraordinary speed and courage—closing to within metres of the British lines—the Zulu assaults were repulsed. A mounted counterattack turned withdrawal into rout, with heavy Zulu losses and relatively light British casualties.
The victory broke the siege of Eshowe and marked a turning point in British operational confidence. Pearson’s garrison was relieved, though the position was abandoned shortly after—logistics, not battlefield defeat, dictating strategy. The campaign also revealed adaptation: Chelmsford had learned from earlier failures, improving reconnaissance, fortification, and ammunition handling.

The episode closes on a mix of the absurd and the ominous: journalists racing each other into Eshowe ahead of the army, a near-duel between Dunn and Zulu forces, and the destruction of Dabulamanzi’s homestead. Yet beneath these moments lies a deeper shift—the British now moving toward overwhelming force, while the Zulu army, constrained by traditional tactics, faced an increasingly unwinnable war.
With Zululand destabilised and British momentum restored, the stage is set for the final phase of the campaign—and the approach toward Ondini, where the war’s conclusion awaits.
Leave a Reply